Move Your Body!

“Well, since the gyms are closed I guess I can’t workout.” I’m guessing quite a few of us wanted so badly for this to be a valid excuse to not move our bodies when we all know deep down that isn’t. Home workouts are HARD! Let me tell ya. Especially when you have to be home all dang day! It’s hard to get yourself motivated enough to actually do it. I’m fortunate that I have gym equipment in my basement and It’s still incredibly difficult for me to get my butt down there. But, I have to keep telling myself this, In 3 months from now, I’ll be glad I didn’t give up, I’ll be glad that I kept going. Discipline and determination are the key factors between success and failure. And I want to succeed. I want to prove to myself that I can do it. No one else is going to do it for me. I’m still working full time from home, while taking care of a 3 month old by myself! So, I’m taking advantage of the fact that I don’t have any driving time. As soon as I am done with work, I don’t even let myself ponder if I am going to workout, I put my laptop away, immediately go downstairs and just get started. And guess what? Never once have I ever regretted a workout. And I about DIED during tonights, and it felt SO GOOD! Let’s all come out of this quarantine strong and healthy, mentally and physically! Utilize this time to do all the things you’ve been putting off or said you’ve been “too busy” to do. Whatever that may be, not just fitness related! But, I wanted to share the workout I did tonight with you all. If you don’t have gym equipment at your house, you can use household items! Like gallons of water, fill a duffle bag with can goods or books for weight, fill purses or bags with heavy items as well to use for weight. (I tested this and it works great lol) If you don’t have resistance bands, just use weights (or what you can find) instead!

F U L L B O D Y W O R K O U T

  • 20 Jump squats
  • 15 High resistance banded bicep curls
  • 30 Kettle bell crossover walking lunges
  • 15 Tricep dips
  • 25 High resistance banded side steps
  • 25 high resistance banded monster walks
  • 15 bent over dumbbell rows
  • 15 (each leg) banded glute kickbacks with band around ankles
  • 15 Dumbbell shoulder presses

Repeat circuit 4 times

Then: 100 Russian twists and 50 crunches to finish!

No rests between sets, only rest between circuits.

Happy Sweating!

Gym Anxiety!

Gym Anxiety. Something I never thought I would have. I started lifting weights at the gym when I was a senior in high school– so it’s been 11 years I have routinely been in the gym! Let me say that again 11 years! So needless to say, I was extremely comfortable and confident in a gym setting. Well, after taking a couple months off with the baby and how much my body has changed, it feels like I’m starting at square one. The first time I went back to the gym, I drove up and sat in my car just staring at the building. What would people say? Do I need to tell everyone I had a baby and that is why my body looks different? Will those who knew me before think I just “let myself go?” Will they say “what happened to her?”? Will people notice that I can’t lift as heavy anymore? I have never been nervous walking into the gym, until that day. And yes, I get some people will think I’m nuts. But, this is my own internal, mental struggle. Eventually, I worked up enough courage to walk inside, trying to make myself unnoticeable and hide behind my coat, walking in with my head down. I put all my stuff in the locker room, took a deep breathe and walked into the weight room. And guess what happened? No one pointed, no one stared, and no one even cared what I was doing. I had myself so worked up over absolutely nothing. We are all there trying to better ourselves and maintain a healthy lifestyle. We all start somewhere, even if you start over 20 times. And I know for a fact when I go to the gym, I’m so focused on what I’m doing, I don’t even pay attention to others. I hardly even remember who was there! People are not paying attention to you as much as you think. I get there are different reasons for feeling anxious going to the gym. But I guarantee, most the people there, are rooting for you. I’ve been to the gym many times since then, and it gets a little easier each time I walk in. I’m in my own head, and really shouldn’t worry about what others are thinking anyway. So this is your sign if you’re anxious or worried, just go for it. It gets better!

Picked my Hairstylists Brain!

I don’t know about you, but taking care of my hair normally falls on the back burner out of everything. I have made a commitment to myself to actively start trying to take better care of it! Last time I went and got my hair done I decided to pick my hairstylist’s brain and thought I would share what we discussed and the questions I asked her! Thank you Emily Hebenstreit! (IG: @emily_stlhair)

What would you say are hair STAPLES? “Definitely shampoo, conditioner and leave in conditioner. If you don’t use a leave in conditioner I highly suggest you start. Not using one is like going in the sun without sunscreen.”

How often should you wash your hair? “Everyone is different but I recommend washing your hair every other day to every two days. If you can hold out, washing every two days is probably better.”

How often should you cut your hair? “After 12 weeks (3 months) your ends are technically split, so that is kind of a guideline to get basic trims.”

What temperature should you set your straighteners & curling irons to? “Usually you shouldn’t have to use your straightener, curling iron or heat tools up to 500 degrees. In my personal opinion I feel like that is way too high. That is basically like an oven, I mean you cook a pizza at 450! You definitely want you use a heat protectant in that case. I would try and stay close to 250 to 300 and after a few passes if you feel like you need more then bump it up a little bit. But definitely see what your hair can do on a lower temperature first. AND make sure your hair is 100% dry before you go in with a heat tool. Most people go straight from blow drying to flat ironing it. If you feel your hair and it feels cold to the touch that means there is moisture in it and you’re actually burning your hair.”

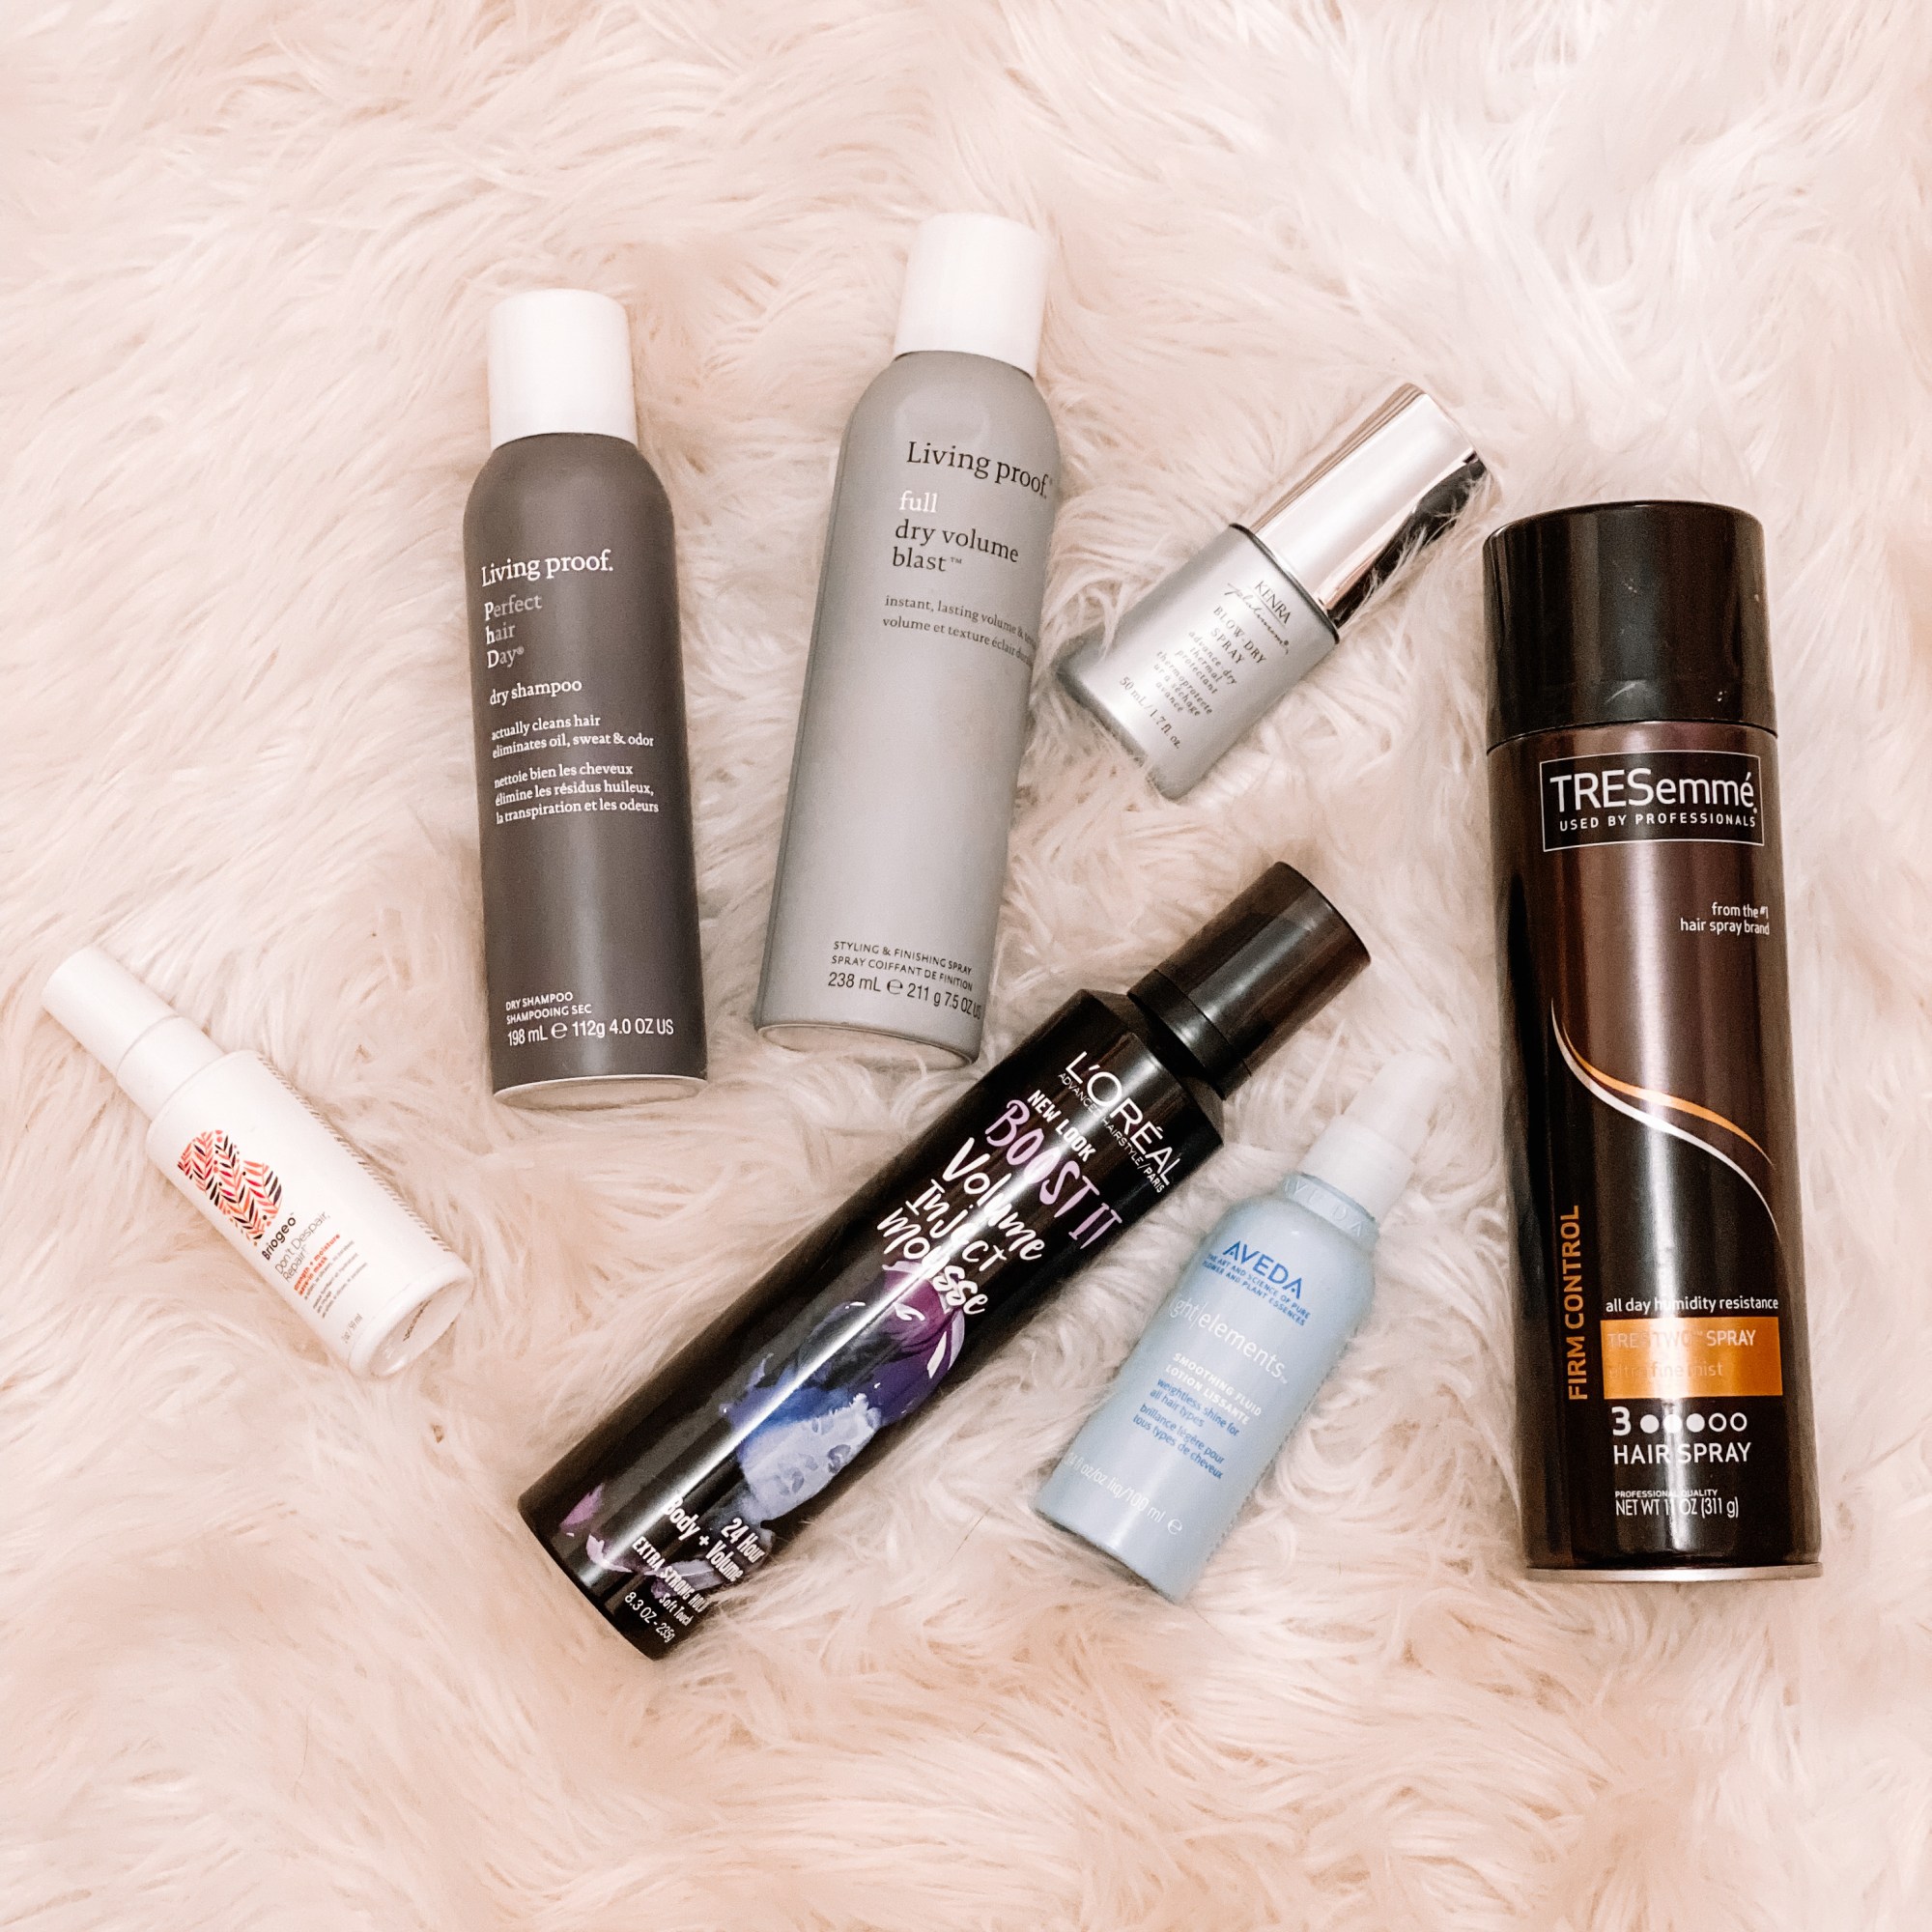
Quality product recommendations? “The price doesn’t necessarily matter. Some products can be super expensive and still have a ton of chemicals in them, while some products can be on the cheaper side and be super natural and organic. Usually if you can get a product line based out of a European country, Europe only has like 10-12 legal chemicals that are legal (in the UK I think) to use. While here in America I believe there are over 1000.”

What would you recommend for someone who has really dry hair? “It really just depends on WHY you have dry hair. If you have dry hair because you highlight it a lot I would recommend products that have repairing properties and agents to them. Such as protein and keratin. If you just naturally have dry hair I would just look for products that are moisturizing. Something that has oils built into the product or something that can help to build up the natural texture of the hair. But it honestly just comes down to why your hair is dry to determine the products to use. “

Best ways to help frizz with curly hair? “It’s different for every person, regardless ,when you get out of the shower use moisture base products, something that has a cream or oil to it. So when you get out of the shower you put in a leave in conditioner, then scrunch it with a cream mousse and when finished you peel the curls apart with an oil, thats the perfect thing to do. Then spray it with a curling hold spray that is non aerosol, because aerosol has alcohols in it. And whenever you have curly hair and you spray it with aerosol, it causes the hair to puff out and frizz a little more. So when you have more of that wet hairspray, it keeps the hair right where it needs to be.”

Best ways to get volume? “So backcombing can have a negative affect on the hair after doing it for a long period of time. And if you’re showering at night and sleeping on your hair wet that will naturally flatten it. You are hindering the process of the natural blowout and what blowouts do to create volume. If you can I would say try your best to blow dry in the morning to prep the hair for the day. Also try to use a volumizing mousse at the roots before blow drying. For dry hair you can use a volumizing spray/root lifter. Dry shampoo will also help with subtle volume”

How to get curls to hold with hairspray without them looking or feeling hard and crunchy? “Get more of a moveable or working hairspray. It’s a hair spray to use while you’re styling verses a finishing spray. They have different finishing textures and a working spray doesn’t leave your hair crunchy, it’s a little bit more moveable but still gives it a hold. Use the finishing spray one time when finished all over.”

How to shampoo and condition your hair properly? “Don’t apply conditioner about 2 inches at the root of your hair. Take your head and flip it upside down in the shower, start from your ends and scrape it up to the root as close as you can with leaving a couple inches untouched. Try and not shampoo the length and ends of your hair. When you go to put the shampoo in your hair, go straight to the scalp and massage it in. And then let the water run the shampoo through the roots to the ends of your hair.”

Best way to increase the life of your color? “Definitely using color safe shampoos. If your stylist uses a particular color line, try and get products that follow the same color line. They are chemically formulated to work together. It comes down to the chemical composition of both products. Try your best not to be in direct sunlight or tanning beds, they can tend to lift the color up. Heating tools can also strip the color from your hair.”

Advice for someone trying to grow out their hair. “Get trims every 3-6 months. Take good vitamins, biotin, use natural, organic products, don’t over wash your hair, and take good care of your overall health!”

How to make my hair look shiny? “Treat it well, don’t chemically or heat damage it as much as possible. You can put oils on it like a conditioning oil or smoothing oil. You can use a shine spray, or anything that has moisture to it “

Department store products, good or bad? “I wouldn’t necessarily say bad for your hair because everyones hair takes products differently. The thing with department store brands or products is that they can sometimes be pumped with animal fats to get bigger bottles and mass produce basically. Places like Marshalls that are a third party store, so basically a buyer is buying products that are expired or are expiring soon and they can do pretty much whatever they want with that product as far as reselling goes.”

Is it good to change your shampoo and conditioner every few months? “Yes! I wouldn’t say to the extent of every few months but maybe every 6 months to a year. Hair definitely builds an immunity towards certain products and thats why if you have a certain color thats been working really well for you for a long time and then your hair doesn’t take that same color after a certain amount of years the same because your hair just changes. So I would definitely suggest changing things up here and there to see if something better suites your hair at different points in your life.”

Fun facts and Tips!

-You want to switch up where you put your ponytail. When wearing the same style pony tail day in and day out it can cause breakage in that area of your hair, especially high ponytails.

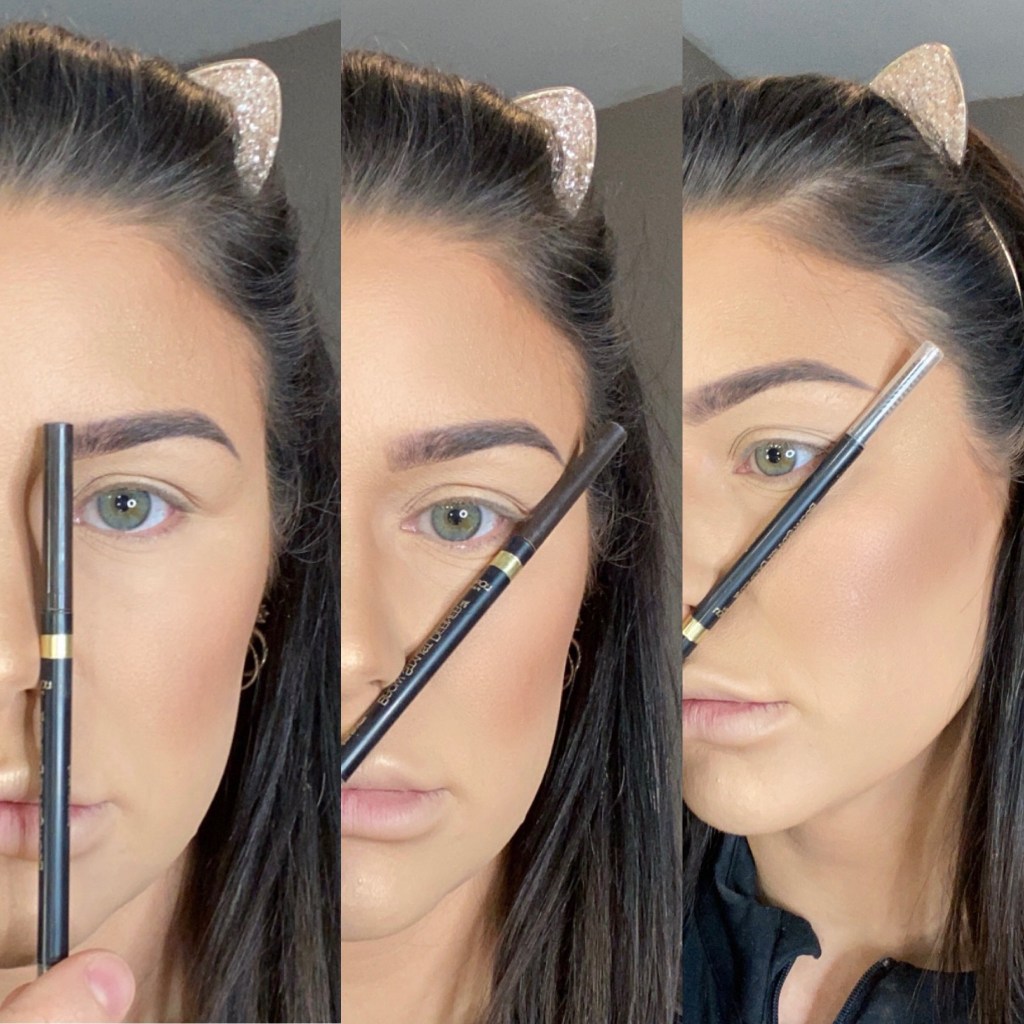
-You can use clear eyebrow gel to take away fly aways and baby hairs around your face.

-If you want to minimize breakage, sleep with your hair in a low braid and hold it with a scrunchy.

-Get a silk pillow case, cotton can cause breakage. When your hair rubs against a cotton pillow case, it causes friction, which can cause breakage, frizz, and dryness.

Redecorated our Bedroom!

I redecorated our bedroom! Since I loved Dallas’s nursery so much I decided to copy. Went with an ivory comforter using blush and grey accents. Here are some tips when decorating a room…// I always hang 96in curtains on windows. By placing the curtain rod closer to the ceiling and not right above the window, it makes the walls appear taller, making it look like you have higher ceilings! Also, MIRRORS! They are more go to decor. Mirrors give an illusional of depth, hence making the room appear larger. There are 5 mirrors in our bedroom alone! lol! Another tip when decorating- use different textures and patterns! They help to make a room appear more interesting and appealing to the eye! Can’t wait to redo another room!! haha! All items I could find are linked in the @liketoknow.it app! user name: kaylanoelblog

I Don’t Recognize Myself

I hate looking in the mirror right now, so why not post it on social media for everyone to see? My blog is called Real Life Things for a reason, and for me, this is pretty darn real. Disclaimer: This isn’t a love your body post (which I totally 100% agree you should! I’m blessed to be alive and able bodied! I also know the amazing miracle my body created and am so unbelievably grateful and thankful for that (it does not go unnoticed)! I also know that I am not my body, I am much more. So please do not take this as I’m being ungrateful, but merely being honest about my feelings and thoughts towards my physical appearance at the moment)..// I currently feel defeated…. I worked so hard for years to be in shape and with that for me, came confidence. I loved my body, I felt great in clothes, didn’t mind wearing tighter fitting items, never cared if my arms were showing and never really thought twice about what to wear. Now, all of that has completely changed. I look in the mirror not recognizing the person looking back at me. Where did all my hard work go? In the blink of an eye my body COMPLETELY changed. I feel like I’m living in a strangers body. Physically, who is this person? I feel like a prisoner. I don’t know them. I wear oversized shirts to hide underneath, with leggings that hold everything in, just to feel comfortable going in public. I was putting on an old pair of jeans on the other day, and could barely button them. I looked in the mirror and almost started crying. I made a post about how the physical changes didn’t bother me as much as I thought they were going to and at the time, that was true, but now, they do. I’m getting impatient and angry. Everyone always says “Oh, when you breastfeed the weight just melts off!” Well, I’m here to tell you that isn’t the case for me. Not one bit. Diet and exercise aren’t moving the scale just yet. And believe me, I know it doesn’t happen overnight. But, seeing no real progress yet is difficult and frustrating. Mentally, emotionally and physically. I know I will have people rolling their eyes at me, but this is MY reality, no one else. To anyone out there feeling guilty about not quite loving your body at the moment, you are not alone. You are allowed to have these feelings and thoughts. BUT if you’re anything like me, you’re too stubborn to just sit back and accept it for what it is. I am determined. And now, this has become a challenge. A challenge that I will fight to win and overcome. Every small win gets me one step closer to my goal. If you need support, reach out! We got this!

Target Try On!

Clothes & Shoes on a budget! Really cute finds for Spring!

Walked in for soap and candles….came out with new clothings items and shoes…oops! (I know you can relate, don’t lie.)

This white top is so unbelievably soft and comfy! Can easily be paired with jeans and dressed up or down in leggings and tennis shoes! And its only $15! It is a little see through so you will probably need to wear a little tank or bralette underneath. It is true to size, but I’m wearing a Large because I wanted it to be a little oversized! These flats are super cute and comfy! Not from target but from Walmart and they’re only $14.97!

Links

Shirt: https://www.target.com/p/women-s-long-sleeve-crewneck-t-shirt-a-new-day-153/-/A-54607185?preselect=77602644#lnk=sametab Shoes: https://www.walmart.com/ip/Women-s-Time-and-Tru-Animal-Print-Feather-Flat/958879695

I love a good, soft button down, definitely not the typical stiff material. This is like butter and super flowy. Longer in the back and very lightweight. Could easily be worn open with a shirt underneath and leggings as well $19.99! Jeans are from American Eagle and O M G. They are actually jeggings and the only “jeans” that I can honestly say I have found comfortable. SO GOOD! $31.96 on sale right now!

Links

Shirt:https://www.target.com/p/women-s-long-sleeve-collared-button-down-shirt-universal-thread/-/A-78142756?preselect=77550787#lnk=sametab Shoes: https://www.walmart.com/ip/Women-s-Time-and-Tru-Animal-Print-Feather-Flat/958879695 Jeans: https://www.ae.com/us/en/p/women/high-waisted-jeans/highest-waist-jegging/ae-ne-x-t-level-highest-waist-jegging/0438_2134_412?menu=cat4840004

I’m really into camo lately so when I came across this jacket I obviously HAD to buy it. It’s more of a charcoal grey, light grey and black than the picture shows. It is super comfy and great for spring! $34.99! And how cute are these rain boots! Super comfy and I would say they run a little bit big. No more soggy socks for me! They are $24.99 and come in multiple colors!

Links

Jacket: https://www.target.com/p/women-s-camo-print-long-sleeve-coat-knox-rose-gray/-/A-78367593?preselect=77526318#lnk=sametab Rain Boots: https://www.target.com/p/women-s-chelsea-rain-boots-a-new-day-153/-/A-53940258?preselect=53775390#lnk=sametab

This is the exact same shirt as the white one pictured about but it was so cozy I decided I needed two ($15)! BUT I absolutely love these shoes! Kind of hard to tell but they are a cheetah type animal print with a rope like sole. They run true to size and are different than your typical “mule”. Super cute for spring! $27.99!

Links

Shirt: https://www.target.com/p/women-s-long-sleeve-crewneck-t-shirt-a-new-day-153/-/A-54607185?preselect=77602644#lnk=sametab Shoes:https://www.target.com/p/women-s-clara-espadrille-mules-universal-thread/-/A-78156249?preselect=77569452#lnk=sametab

As you can see I am really into animal prints lately. This blouse is absolutely adorable and only $20! Comes in a BUNCH of different prints too. Great for work OR a night out! Can be worn tucked in or untucked. I paired it with high waisted work pants but could definitely be worn with jeans and some black flats or heels! Pants are from amazon and only $23.99!

Links

Shirt: https://www.target.com/p/women-s-regular-fit-bishop-long-sleeve-collared-blouse-a-new-day/-/A-78264116?preselect=78054221#lnk=sametab Pants: https://www.amazon.com/gp/product/B07Z3BC9ZC/ref=ppx_yo_dt_b_asin_image_o03_s00?ie=UTF8&psc=1

Step by Step Makeup Application!

So let’s talk makeup! I have always absolutely loved makeup, but have I always been good at it? Heck no. I believe that makeup is used best when it makes you feel good, no matter how it is applied or how much or little you use, it’s a personal preference and no one should tell you otherwise. Whether you are a makeup mogul or an au natural girl, it is your choice! You can’t please everyone, so do what makes you confident and ignore the rest! I wanted to share with you all MY step by step makeup routine with products I use and how I apply them. Again, this is MY makeup routine and how I apply it. I did not go to school for cosmetology but was trained by two amazing makeup artists, Emina Osmanovic and Joy Loveless. I definitely use techniques they taught me but also some of my own. When working with clients I normally did eyes first because I was using multiple eyeshadows and their looks were normally more glam. This tutorial is face first then eyes because the eye look is SUPER simple.

Ok , first things first, your makeup will only look as good as your skin underneath (or a filter lol!). I use Tinkle razors from Amazon to rid myself of peach fuzz every few days so my makeup goes on smoothly. I also highly recommend a good skin care routine to keep your skin moisturized (you could use a bunch more skin prep products before you do your makeup but this is my everyday so I use minimum prep). All brushes that I use are pictured above with captions of what I use them for. ALSO ignore my roots and the powder all over my shirt! So now that I have said my disclaimer, lets jump into the steps!

Prep Work/Skin

  • First thing, start with a clean face! Then, make sure to moisturize and pull the lotion down your neck. (I think your neck ages 7x faster than your face, or something like that! eeeekkk!)
  • After moisturizer is on, apply MAC Fast Response Eye Creme underneath your eyes to help brighten and wake them up!
  • Next, apply primer to your face, I use NYX Angel Veil for all over the face and Porefessional where pores are largest. The trick with pore filling primers is to squeeze onto finger and rub together to warm it up. Then apply to the areas of your face where your pores are largest/most noticeable. Normally this is on your cheeks and your chin. Make sure to press it into your skin, not wipe. This way it really helps to blur your pores.
  • After primer has been applied, grab your foundation (I use Estee Lauder Double Wear at the moment) and pour a nickel to quarter size amount on the back of your hand (this warms up the foundation so it doesn’t slide off your skin). Dab your beauty blender into the foundation (make sure you wet your beauty blender first). I hold my beauty blender with my pointer finger at the tip so I have better precision and control.

Foundation

  • Start by applying your foundation in the center of your face and work outwards by bouncing your beauty blender up and down. This way it won’t be thick at your neck/jawline. Do not forget your ears, behind your ears, the crevices by your nostrils and make sure to pull down and blend onto your neck. This will give you an all over even appearance.
  • If you start to notice an area where your foundation isn’t wanting to stay put, slow down how fast your bouncing the beauty blender. Take the sponge, press down slow on the area and release slow. This will help to keep the product in place.

Concealer

Next, it is time to apply concealer. I use the holy grail of concealers, Tarte Shape Tape (I vary between shades depending on how dramatic I want the lighted areas of my skin to be….shade in picture is Light Neutral.

Take the wand and apply under the eyes, bridge of nose, forehead, chin and smile lines (personal preference). You don’t need to use a ton of product, a little does a long way (even though I use a lot 🙂 ). And remember, this is where light would naturally hit your face that you are trying to accentuate. So, if you have a larger forehead you will want to use a smaller amount and vice versa. Blend out with beauty blender.

I do not do a creme contour on my everyday look, so my next step is to set my face with Milani Make it Last setting spray. Since I am done with creme products this helps to lock them into place and really fuse them together.

Powders/Bronzer:

Once your face is dry, it is time to set the areas with setting powder. My personal preference for setting powder is Laura Mercier Translucent setting powder or Huda Beauty. Take your beauty blender, dip into powder and apply to the same areas you applied concealer to set them- for reference look at the picture to the left. Next take large fluffy brush and wipe away powder and blend all over face.

Face should be set and very “flat” looking.

Next, use the Kat Von D Shade & Light Palette (or powder highlight &contour palette of choice). Grab a medium, pointed, fluffier brush (see top pictures) and pick up the desired lightness of shade, tap the brush to get rid of any fallout and apply to your under-eyes, forehead and chin.

Then use MAC Studio Fix OR Fit Cover powder, and apply everywhere you didn’t place the brightening powder with a kabuki brush or a fluffier condensed brush. Pick up product with brush, and tap to get rid of any fallout again. Press lightly into skin and make sure to BLEND and pull the powder down along your jawline onto your neck. Then, set my face with setting spray again. Wait for it to dry.

After your face is dry it is time to apply bronzer. Currently I’m using Too Faced Chocolate Soleil mixed with MAC Give Me Sun!. You will want to grab a medium to large fluffy brush, pick up the product with your brush, tap to get rid of any fallout so it doesn’t go on too heavy. You can always build up. Dab on cheeks and blend towards your ears moving the brush in small circular motions, then move up the temple onto sides of forehead and the top, then move down to the back of the jaw and underneath the jawline and under the chin (this movement should almost make a number 3 on the side of the face. Lastly, apply bronzer to the sides of the neck. Your face should now have more dimension to it.

Contouring

Up next is contouring. I Use the Kat Von D Shade & Light Palette also to contour. Using a Morphe R10 brush dip into the shade that is best for your skin tone, I use the medium shade. Tap brush to get rid of fall out. Start by applying product using a light pressure, pressing motion of the brush onto skin underneath cheekbone, the right above the top of your tragus is a good starting point. Next, blend by pulling the product with the brush down towards the the top of the corner of your mouth (do not go all the way to the corner!). The farther you pull the contour towards your mouth the more intense the contour will be (you can end up looking very sucked in, so be careful of this). After you have your basic cheek contour shape you can continue blending upwards towards the cheek bone, never blend down towards the jawline. We are trying to get an uplifted appearance to chisel the face, not sunken in. Pull the contour up the temple into the hairline, do not pull too far down. Pull and blend under jaw and chin depending on how chiseled you want your jawline to look. Then use a precision, eyeshadow brush to draw blended contoured lines down the sides of the nose to give it a slender appearance. Take the same brush and apply underneath your bottom lip to give a poutier/shadow appearance to your bottom lip.

If your contour gets a little messy and you want more of a precision you can clean it up using studio fix powder. Grab a DRY beauty blender, swirl it around in the product, start about mid ear and pull down underneath the contoured line towards the corner of your mouth. Grab more product and pull down the sides of your nose. See picture for reference! Let that sit for a minute and wipe away access.

Highlighter:

Then grab your highlighter of choice, currently I am using Becca Cosmetics, Prosecco Pop. Take your highlighting brush, pick up product, tap off excess and dab onto cheek bones, tip and bridge of nose, cupids bow and slightly above eyebrows and slightly on chin. Use your finger to apply down the center of your nose-just a small amount and tap it on.

Blush

Next step is blush. Grab an angled blush brush, swirl/dab into blush of choice (I switch between MAC blush shades Sweets for My Sweet and Melba) dab onto apple of cheek and blend upwards towards cheek bone, but don’t pull too far up.

Set face with Milani setting spray. (if you want a brighter/more intense highlight, apply highlighter after you set your face)

Eyebrows:

(Products used: NYX Micro Brow Pencil & L’Oreal Brown Stylist Definer, NYX Control Freak Eyebrow Gel)

Anyone else’s brows have the issue where one is like “Yaaaasss sis, I’m here for it, I gotchu” and the other one shows up like “Hi, I’m here to humble you today.” Lol! Like they say, eyebrows should be sisters not twins. Anyway…

There are a bunch of different ways that you can do your brows. This is just how I do mine! Take an eyebrow pencil and put it on the edge of your nostril, this is “technically” where your brow should start. Then take your pencil and angle it at your nostril to the outer corner of your eye and this is where the tail should end. I start with using a shade that is slightly lighter than my natural brow color for almost like a “background’ color is you will. I fill in a little more with this color. First, use the spoolie end to brush the hairs up. This shows any areas that hair is sparse and need to be filled in. Then, I take my eyebrow pencil and flatten the product so there is a blunt end. This allows for better precision when drawing lines. When drawing the hairlike strokes, draw the lines the natural way the hair grows. I start on the bottom of my brow and draw (pressing lightly) hair like strokes to define the bottom of my brow. Then, I move to the top of my brow, brush the hairs down and draw hair like strokes angled downward to define the top of the brow. I pull my tail out slightly longer than my hair grows. Then take the darker shade, make sure the end is blunt (pressing harder) and draw hairlike strokes. Brows should be lighter at the front and gradually get darker to the tail. Don’t draw too dark of strokes towards the front since you want this section lighter and to fade/blend into the rest of the brow. Use the spoolie end to blend this section of the brow to give that faded appearance. Finally, I use my clear eyebrow gel to set the hairs by brushing upward and taming any out of place.

(If you mess up don’t freak out, take a q-tip and lightly wipe away the mistake, take your beauty blender, using the side with product on it, dab the area where you wiped away the mistake, then blot the area with your kabuki brush and start over).

Eyeshadow:

Product ( for this picture I actually used my Too Faced Matte Bronzer as my eyeshadow for the day…don’t necessarily recommend this but I like the shade haha)

To keep it simple I only use one eyeshadow color for my everyday look. You could write a novel on different eyeshadow tutorials! I may do a very basic cut crease one in the future, but for today, basic and matte is what were working with!

Take a large, fluffy eyeshadow brush and pick up a warm neutral shade of tan/brown, swirl it and move the brush back and forth into the product then tap off the excess (you can always build more product on, don’t go in too heavy handed). Next, pat the product on your eyelid and start to swirl the brush in small circular motion to blend up towards your brow. Once you have the desired color and blending, pick up a smaller, fluffy eyeshadow brush and apply it to your lower lash line moving the brush back and forth under your eye pulling the product down about 1/4 inch underneath. If you want you can always add a little darker color to the corner and crease of your eye with a shimmer shadow over the lid. BUT that is for another day 😉

Eyelashes:

(Products used: Essence Lash Princess, Too Faced Better Than Sex, Ardell Wispie Lashes, DUO lash glue)

First things first, I always curl my lashes with an eyelash curler first. Make sure you get right at the base and pump the curler to lift your lashes (I’m sure this goes unsaid-but top lashes only! lol). Next go in with your mascara at the root/base of your lashes and wiggle the wand back and forth while moving up the lashes. Do that until mascara is applied on all lashes then go back in with upward motions to add another layer. Continue this until you get your desired look. Same motions for bottom lashes as well. If you are applying false lashes, take the lash and place it on your eye to measure the length. Cut off any excess to fit your eye. Take the lash and put your pointer fingers and thumbs at each end and bend the lash so it takes the shape of your eye (almost like a rainbow shape) and bend it a few times back and forth so it starts to take that shape. Grab the lash glue and (squeeze very carefully!) apply a very thin line all over the lash line, you do not need a lot! Too much will get messy and your lashes will slide all over. Blow on the glue until it is somewhat tacky (this shouldn’t take long). I know you technically aren’t supposed to apply lashes with tweezers but that’s what I use. Grab the lash with tweezers at the base in the middle as seen in the picture. Look in the mirror and tilt your head backward, apply lash to the middle of the lash line, then place the ends onto the corners of your eye at lash line. Then take your finger and and press lashes in and up to make sure they are secure. Apply mascara if desired.

Lips:

Products used: NYX Suede lipliner-color-sandstorm, Too faced Melted matte- Shades Cool Girl and Holy Chic!

Start by making sure your lip liner pencil is sharpened. For reference, I over line my lips, but the same steps can be taken without over lining. Next, you will make a cross starting at the top of your cupids bow so the liner forms a V at the top. Go to each point at the top of the V and draw towards the corners of your mouth following your lip line. I fill in the top as seen in the picture but it is not necessary. Next, go to the center of your bottom lip and tighten your lip. Draw a line underneath in the center and connect it up to the corners of your mouth. I fill in the center of my lip with the liner, but again, not necessary.

Apply darker shade (I used Cool Girl) all over lips then add Lighter shade (I used Holy Chic!) in the center of the top and bottom lips and press your lips together. Next step you can either use your finger or a smaller condensed brush- you will want to tap over your lips to blend the colors- try to keep the lighter color focused in the center to give your lips slight dimension.

When Finished Color should look similar to this! Can add gloss if desired. Set face with setting spray one last time and VOILA!

Final Product!!

Please ignore all the powder and product on my shirt! Lol! Hope this was helpful!

My First Blog Post

Get to know me!

undefined
I live for comfy, oversized shirts, leggings and slippers!

Hello everyone! So glad that you have stumbled upon my blog and have decided to give it a read. I don’t know who cares what I have to say , but we’re gonna find out! I hope you are snuggled up in your cozies on the couch with your drink of choice in hand ready to hang out with me! I’ll start with doing the boring, typical introduction (you know, the kind where your teacher made you stand up in front of the class spitting off facts about yourself lol!) Anyway….. I am married to my husband Zach. We welcomed our beautiful baby girl, Dallas Rae, into the world on December 26th, 2019. New mom here with ALL the struggles, woot woot! We have two dogs, Diesel and Roscoe, who are also family! Yes, I am one of those crazy dog people who is obsessed with their fur babies. Zach and I both were born and raised in Missouri which is where we still reside. Zach is an electrician and I am a business/admin manager for a tech start up company. I used to be a makeup artist as well but when our daughter was born I discontinued taking on clients. My true passions in life are fitness, beauty, style/fashion, home decor, dog rescue and being a mom! If you’re looking for recipes or cooking ideas, I am not your gal. I actually despise cooking lol! I can’t cook to save my life! I hope you choose to hangout with me alongside this journey, where I discuss real life things! Can’t wait to get to know each other! 🙂

Kayla